ブログを作りながらGatsbyのテーマを理解する!
2020年05月29日
今回、Gatsby のテーマを使ってブログを作ってみようと思います。
最後まで読めば、自分のブログを得ることができ、拡張していく理解も得られていると思います!!
おそらく30分~1時間後ぐらいには以下のようなサイトを手に入れていると思います💪
👍 Demo
テーマを探す
テーマを探すには、以下のサイトがおすすめです!
- 公式サイトのプラグインライブラリで gatsby-theme と検索
- JAMstack ThemesでGatsbyを選択
今回は、gatsby-theme-novelaというテーマを使ってみようと思います。
First Step
こちらでも書いたように、Gatsby のテーマはプラグインの一種です。
既にある Gatsby サイトにテーマを導入することも可能ですが、
今回は 1 から Gatsby サイトを作っていきましょう。
gatsby-theme-novelaを使ったスターターが用意されているので、こちらを使いたいと思います。
このスターターは、テーマを使い始める最低限の設定が既にされています。
すぐにブログを始めることもできますし、ダウンロードしたスターターのコードを変更したりテーマのシャドウイングをして、サイトのカスタマイズをすることもできます。
さあ!スターターを使います!
gatsby new blog-using-novela-theme https://github.com/narative/gatsby-starter-novelacd blog-using-novela-themegatsby develop
または
git clone git@github.com:narative/gatsby-starter-novela.git blog-using-novela-themecd blog-using-novela-themeyarngatsby develop
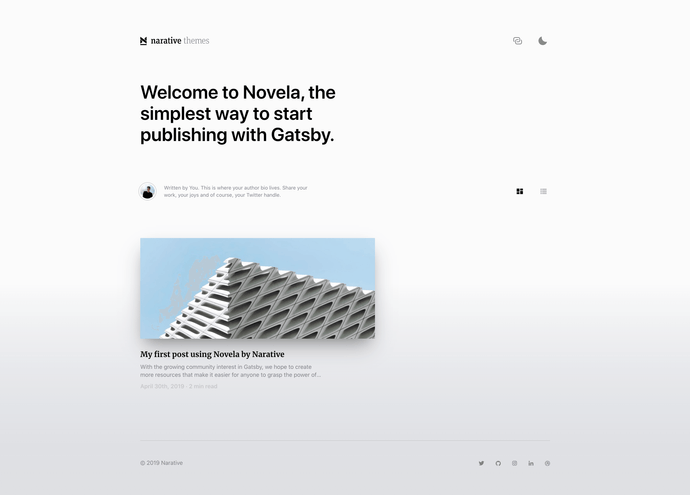
これだけで、既にこのようなリッチなブログが完成です。
Demoもちろん、今の状態からでも記事を書いてブログを始めることができます!
当記事ではこのあと以下の作業をしてみようかと思います!
- デプロイする
- Author を追加する
- サイトの設定を変える
- 記事を書く
スターターの役割
作業を開始する前に、gatsby-starter-novelaを使って始めたサイトの現状のコードをかんたんに把握しましょう。
現在のサイト内の構成は以下の通りです。
blog-using-novela-theme├── content│ ├── authors│ │ ├── avatars│ │ │ ├── dennis-brotzky.jpg│ │ │ └── thiago-costa.png│ │ ├── dennis-brotzky.yml│ │ └── thiago-costa.yml│ └── posts│ └── 2020-01-01-my-first-novela-post│ ├── images│ │ ├── article-image-1.jpg│ │ └── article-image-2.jpg│ └── index.md├── node_modules├── src│ ├── assets│ │ └── favicon.png│ └── pages│ └── 404.js├── static│ └── admin│ └── config.yml├── gatsby-config.js└── package.json
まずはgatsby-config.jsを見てみましょう!
このなかのpluginsでテーマをオプション付きで使っています。
plugins: [{resolve: "@narative/gatsby-theme-novela",options: {contentPosts: "content/posts",contentAuthors: "content/authors",basePath: "/",authorsPage: true,sources: {local: true,// contentful: true,},},},...
gatsby-config.jsではテーマの他に、サイト名などのサイトの設定がされています。
(あとで変えていきたいきます!)
gatsby-config.jsの他には、content/以下に author の設定や記事のファイルがあることがわかると思います。
デプロイする
今回はNetlifyにデプロイしてみようと思います。
方法は netlify-cli を使うかブラウザで操作するかがあります。
どちらも簡単にすぐにデプロイ出来るのでやってみましょう!
ブラウザで操作する簡単な手順は以下の通りです。
- 先程作ったサイトを自身の GitHub などの git プロバイダーのレポジトリに push する
- Netlifyにアクセスし、ログインする
New site from Gitボタンをクリック- 先程 push した git プロバイダーに接続して、Netlify の使用を許可する
- 先程 push したレポジトリを選択し、
Deploy siteボタンをクリック
以上で完了です。
あとは、push するたびに自動でデプロイが行われます!!
Author を追加する
どこを変更するか?調査する
もう一度現在のサイト構成をご確認ください。
blog-using-novela-theme├── content│ ├── authors│ │ ├── avatars│ │ │ ├── dennis-brotzky.jpg│ │ │ └── thiago-costa.png│ │ ├── dennis-brotzky.yml│ │ └── thiago-costa.yml│ └── posts│ └── 2020-01-01-my-first-novela-post│ ├── images│ │ ├── article-image-1.jpg│ │ └── article-image-2.jpg│ └── index.md├── node_modules├── src│ ├── assets│ │ └── favicon.png│ └── pages│ └── 404.js├── static│ └── admin│ └── config.yml├── gatsby-config.js└── package.json
Author の情報は、your-site/content/authors/以下にあるようですね。
順にコードを確認して理解し、自分の情報を設定していきます。
おっと、その前に、いまある記事に目を通したいと思います。
このように metadata が設定されています。
---title: My first post using Novela by Narativeauthor: Dennis Brotzkydate: 2019-04-30hero: ./images/hero.jpgexcerpt: With the growing community interest in Gatsby, we hope to create more resources that make it easier for anyone to grasp the power of this incredible tool.---
👀
authorに「Dennis Brotzky」が指定されてますね
続いて、author の設定ファイルを見てみましょう!
name: Dennis Brotzkybio: |Written by You. This is where your author bio lives. Share your work, yourjoys and of course, your Twitter handle.avatar: ./avatars/dennis-brotzky.jpgsocial:- url: https://unsplash.com- url: https://stackoverflow.com- url: https://github.com- url: https://github.com- url: https://github.comfeatured: true
💡
記事で指定したauthorと設定ファイルのnameが一致するauthorを使っているようです!
この設定は現在、サイト内の以下の場所で使用されています。
自分自身を author に追加し、既存 author を削除する
新たに自分自身の author 設定ファイルを作成し、
avatar 画像を追加し、
既存記事の author を自分自身に変えます。
そして、既存の author は不要なので削除します。
blog-using-novela-theme├── content│ ├── authors│ │ ├── avatars- │ │ │ ├── dennis-brotzky.jpg- │ │ │ └── thiago-costa.png+ │ │ │ └── yuuki-okamoto.jpeg- │ │ ├── dennis-brotzky.yml- │ │ ├── thiago-costa.yml+ │ │ └── yuuki-okamoto.yml│ │
以下の設定ファイルを追加し、avatar 画像のyuuki-okamoto.jpegを追加します。
name: 岡本 侑貴@筋肉チョットデキルbio: |筋肉バカ。筋トレしてコード書いて、毎日幸せに生きてる。ボディビルのおかげでメンヘラ完治。2021年東京オープンボディビル選手権で最高の身体に仕上げてつよつよエンジニアになる!!avatar: ./avatars/yuuki-okamoto.jpegsocial:- url: https://github.com/YuukiOkamoto- url: https://twitter.com/it_fitness_jpfeatured: true
次に記事の author を変更します。
---title: My first post using Novela by Narative- author: Dennis Brotzky+ author: 岡本 侑貴@筋肉チョットデキルdate: 2019-04-30hero: ./images/hero.jpgexcerpt: With the growing community interest in Gatsby, we hope to create more resources that make it easier for anyone to grasp the power of this incredible tool.---
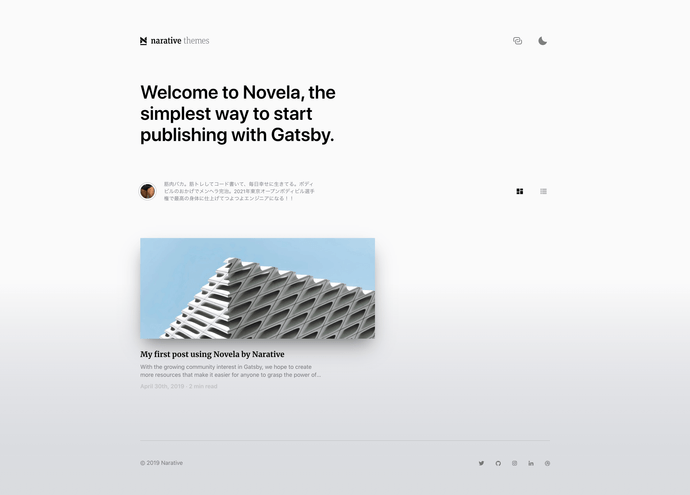
これで記事の author が自分に変更され、自分の author ページも出来上がりました。
サイトの設定を変える
現在、サイトの状態はスターターの初期設定のままのものが多いです。
例えば、
- ヘッダー左上のサイトロゴ
- トップページの説明
- meta タグ
- コピーライト
- フッターの SNS リンク
- PWA の設定
これらを自分のサイト用に変えてきましょう。
表示されているコンポーネントのコードを読み、
変更する箇所を特定し、
変更を加えたいと思います。
ヘッダー左上のサイトロゴ
コーデリーディングの過程は省略しますが、以下のコンポーネントが関係していそうです。
gatsby-theme-novela/src/components/Navigation/Navigation.Header.tsxでLogoコンポーネントを表示している👀import React, { useContext } from 'react';import Logo from "@components/Logo";...const NavigationHeader: React.FC<{}> = () => {...return (<Section><NavContainer><LogoLinkto={rootPath || basePath}data-a11y="false"title="Navigate back to the homepage"aria-label="Navigate back to the homepage"back={showBackArrow ? "true" : "false"}>{showBackArrow && (<BackArrowIconContainer><Icons.ChevronLeft fill={fill} /></BackArrowIconContainer>)}<Logo fill={fill} /><Hidden>Navigate back to the homepage</Hidden></LogoLink><NavControls>{showBackArrow ? (<buttononClick={() => navigate(previousPath)}title="Navigate back to the homepage"aria-label="Navigate back to the homepage"><Icons.Ex fill={fill} /></button>) : (<><SharePageButton /><DarkModeToggle /></>)}</NavControls></NavContainer></Section>);};
テーマをシャドウイングしてカスタマイズします。
シャドウイングしたいコンポーネントのパスが@narative/gatsby-theme-novela/src/components/Logo/Logo.tsxなので、
src/@narative/gatsby-theme-novela/components/Logo/Logo.jsというファイルを自サイトに作ります。
任意の svg を記述してください。
svg の fill は props の fill を使いましょう。
トップページの説明
テーマのソースコードを読んでみると、ArticleHeroコンポーネントで表示しているようです。
import React, { useContext } from 'react';import { graphql, useStaticQuery } from 'gatsby';...const authorQuery = graphql`{site: allSite {edges {node {siteMetadata {hero {headingmaxWidth}}}}}}`;const ArticlesHero: React.FC<IAuthor> = ({ authors }) => {const { gridLayout = 'tiles', hasSetGridLayout, setGridLayout } = useContext(GridLayoutContext,);const results = useStaticQuery(authorQuery);const hero = results.site.edges[0].node.siteMetadata.hero;const tilesIsActive = hasSetGridLayout && gridLayout === 'tiles';const featuredAuthor = authors.find(author => author.featured);if (!featuredAuthor) {throw new Error(`No featured Author found.Please ensure you have at least featured Author.`);}return (<Section relative id="Articles__Hero"><HeadingContainer style={{ maxWidth: `${hero.maxWidth}px` }}><HeroHeading dangerouslySetInnerHTML={{ __html: hero.heading }} /></HeadingContainer><SubheadingContainer><Bio author={featuredAuthor} /><GridControlsContainer><GridButtononClick={() => setGridLayout('tiles')}active={tilesIsActive}data-a11y="false"title="Show articles in Tile grid"aria-label="Show articles in Tile grid"><Icons.Tiles /></GridButton><GridButtononClick={() => setGridLayout('rows')}active={!tilesIsActive}data-a11y="false"title="Show articles in Row grid"aria-label="Show articles in Row grid"><Icons.Rows /></GridButton></GridControlsContainer></SubheadingContainer></Section>);};...
また、siteMetadata の hero の heading 情報が使われていることもわかります。
これは、gatsby-config.jsで設定されています。
以下のように任意の文章に変えてみましょう!
(ついでにmaxWidthも変えてみた)
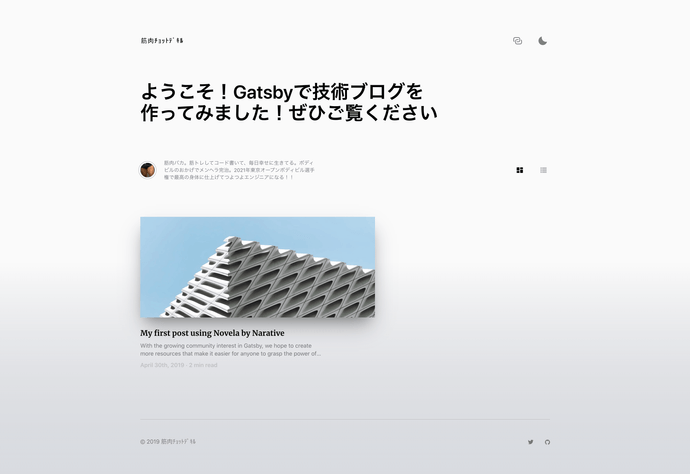
module.exports = {siteMetadata: {title: `Novela by Narative`,name: `Narative`,siteUrl: `https://novela.narative.co`,description: `This is my description that will be used in the meta tags and important for search results`,hero: {- heading: `Welcome to Novela, the simplest way to start publishing with Gatsby.`,+ heading: `ようこそ!Gatsbyで技術ブログを作ってみました!ぜひご覧ください`,- maxWidth: 652,+ maxWidth: 829,},...},...};
meta タグ
meta タグの設定はテーマ内の SEO コンポーネントに記述があります。
パッと見た感じ、以下の GraphQL クエリを使って取得するデータを使っているようです。
const seoQuery = graphql`{allSite {edges {node {siteMetadata {descriptionsocial {urlname}siteUrltitlename}}}}}`;
これらはgatsby-config.jsで設定している以下の箇所ですね。
module.exports = {siteMetadata: {title: `Novela by Narative`,name: `Narative`,siteUrl: `https://novela.narative.co`,description: `This is my description that will be used in the meta tags and important for search results`,hero: {heading: `ようこそ!Gatsbyで技術ブログを作ってみました!ぜひご覧ください`,maxWidth: 829,},social: [{name: `twitter`,url: `https://twitter.com/narative`,},{name: `github`,url: `https://github.com/narative`,},{name: `instagram`,url: `https://instagram.com/narative.co`,},{name: `linkedin`,url: `https://www.linkedin.com/company/narative/`,},{name: `dribbble`,url: `https://dribbble.com/narativestudio`,},],},...};
これを以下のように任意の設定に変えましょう!
module.exports = {siteMetadata: {title: `筋肉チョットデキル`,name: `筋肉チョットデキル`,siteUrl: `https://blog-using-novela-theme.netlify.app`,description: `筋肉はちょっとできる、ボディービルダーなエンジニアブログ`,hero: {heading: `ようこそ!Gatsbyで技術ブログを作ってみました!ぜひご覧ください`,maxWidth: 829,},social: [{name: `twitter`,url: `https://twitter.com/it_fitness_jp`,},{name: `github`,url: `https://github.com/YuukiOkamoto`,},],},...};
コピーライト
以下のソースコードを見てみると、コピーライトには siteMetadata の name が使われているようです。
これは先程変更したので OK です。
フッターの SNS リンク
これも先程gatsby-config.jsで siteMetadata の social を変更したので OK です!
コピーライトでも紹介した Footer コンポーネントにて GraphQL で social 情報を取得し、SocialLinksというコンポーネントに渡しています。
PWA の設定
gatsby-plugin-manifestで行われる PWA の設定がスターターの設定のままです。
変更しましょう!
module.exports = {plugins: [{resolve: `gatsby-plugin-manifest`,options: {- name: `Novela by Narative`,+ name: `筋肉チョットデキル`,- short_name: `Novela`,+ short_name: `筋肉チョットデキル`,start_url: `/`,background_color: `#fff`,theme_color: `#fff`,display: `standalone`,icon: `src/assets/favicon.png`,},},...]};
ついでに favicon(src/assets/favicon.png)も任意の画像に変更します。
設定の完了!!
これで設定が完了しました!
記事を書く
さあ!最低限のサイトの設定は完了です!
記事を書いていきましょう!!
content/posts以下に記事を追加することで、ページが作成されます。
記事を配置するパスを変えたい場合は、テーマのオプションを指定します。
module.exports = {plugins: [{resolve: "@narative/gatsby-theme-novela",options: {contentPosts: "content/posts",contentAuthors: "content/authors",basePath: "/",authorsPage: true,sources: {local: true,// contentful: true,},},},...]};
contentPosts を別のパスに変更すると、記事の配置位置を変えることができます!
他にも以下のオプションを指定できるのでご参考ください。
| Option | Default | Description |
|---|---|---|
| contentPosts | content/posts | 記事ファイルの位置 |
| contentAuthors | content/authors | 著者ファイルの位置 |
| authorsPage | false | 著者ページを作るかどうか |
| authorsPath | /authors | 著者ページの URL パス |
| rootPath | / | サイトのインデックスの URL パス |
| basePath | / | サイトのベース URL パス |
| pageLength | 6 | 1 ページに表示する記事数 |
| articlePermalinkFormat | :slug | 記事のパーマリンクのフォーマット 例: :year/:month/:day/:slug |
| mailchimp | false | 各 Post で Mailchimp の購読を有効にする |
| sources.local | true | ローカルのファイルからのデータ取得を有効にするかどうか |
| sources.contentful | false | Contentful からのデータ取得を有効にするかどうか |
また、記事の metadata は以下の項目を指定できます。
| Key | Required | Type | Description |
|---|---|---|---|
| title | required | String | タイトルを指定。デフォルトの slug に登録される |
| slug | optional | String | タイトルで登録されるデフォルトの slug を上書きできる |
| author | required | String Ref | 著者の名前を指定 |
| date | required | Date | YYYY-MM-DD 形式で日付を指定 |
| hero | required | Image | hero 画像を指定。最小幅 1200px を推奨 |
| excerpt | required | String | 要約を指定。140 字以内 |
| subscription | optional | String | mailchimp が有効になっている場合は、個々の投稿の購読ボックスを無効にする |
| secret | optional | Boolean | 公開設定 |
💪
以上でブログを書き始める準備はすべて整いました!
他にも自分好みに設定することで勉強にもなるのでおすすめです!
自分の技術ブログを使ってエンジニアライフを楽しみましょう!!
以下記事もご参考にください!!


